How to install (with Conda) jupyter, R and R packages
Posted on March 25, 2022
 with prompt; 'jupiter :: book cover :: by David Mann'. You can share and adapt this image following a CC BY-SA 4.0 licence")
Installing and controlling R and jupyter notebooks through conda is a much easier than installing it natively. I give a full explanation at the end as to why I do this way, but here's the method to start with.
You can naturally change the name of the conda env (I used mapdemo here) to anything you like. I use
mamba here to speed up the install process. I highly recommend mamba! I explain mamba in more detail here.
The first mamba install line is to install jupyter notebook, the second is for R, the R kernel for jupyter and
common R packages dplyr and ggplot. The third mamba install line is for more specific R packages I want to use,
these are not required for the ggplot example below, but I have included them here just to give you an idea.
I use these packages in the post about making maps with R.
Requirements:
conda create -n mapdemo mamba
conda activate mapdemo
mamba install -y -c conda-forge pip notebook  nb_conda_kernels  jupyter_contrib_nbextensions
mamba install -y -c conda-forge r r-irkernel r-ggplot2 r-dplyr
mamba install -y -c conda-forge r-sf  r-ggrepel  r-cowplot r-maps
Starting the notebook
Once these are all installed you can start the jupyter notebook from a diretory of your choosing. Here I just
make a demo directory
mkdir demo
jupyter notebook
You will then see the jupyter service start up and it will tell you where you can access it i.e. http://localhost:8888/
(mapdemo) ubuntu@chomp:~/code/demo$ jupyter notebook
[I 10:36:03.954 NotebookApp] [nb_conda_kernels] enabled, 8 kernels found
[I 10:36:04.186 NotebookApp] [jupyter_nbextensions_configurator] enabled 0.4.1
[I 10:36:04.188 NotebookApp] Serving notebooks from local directory: /home/ubuntu/code/demo
[I 10:36:04.188 NotebookApp] Jupyter Notebook 6.4.11 is running at:
[I 10:36:04.188 NotebookApp] http://localhost:8888/
[I 10:36:04.188 NotebookApp] Use Control-C to stop this server and shut down all kernels (twice to skip confirmation).
If everything is working you will see the dashboard like below.
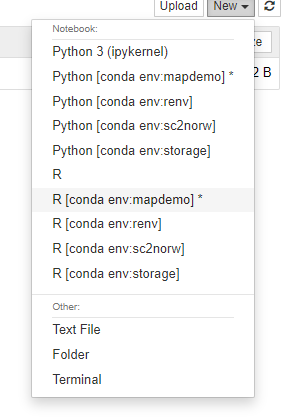
The key thing to remember is to start your notebooks with the right kernel. In this case we want to R kernel from the
conda environment we created - mapdemo.
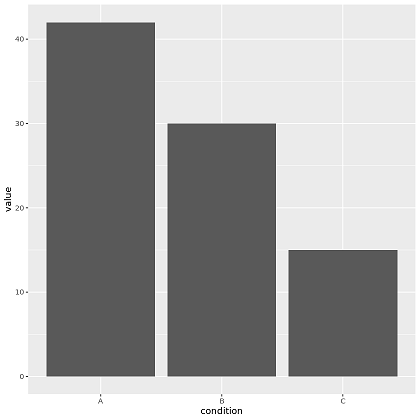
A quick example plot
You can write your R code as normal. Below is a simple example using ggplot.
library(ggplot2)

df <- data.frame(condition=c("A", "B", "C"),
                value=c(42, 30, 15))

p<-ggplot(data=df, aes(x=condition, y=value)) +
  geom_bar(stat="identity")
p
Why do I do it this way?
People who regularly use R will say that what I have described is too complicated. They will say:
This is very complicated, I never had a problem installing anything in R (natively).
They will also say:
If the problem is around keep seperate versions of R and R packages for different projects why not use renv? https://rstudio.github.io/renv/index.html
Or even:
jupyter sucks, use Rstudio
I am not a regular R user, and I do not like the language. But I cannot deny that the figures
it can generate are fantastic and I use it regularly for that purpose. I mainly use python,
and jupyter notebooks are a comfortable way to do interactive data analysis. By installing
the R kernel to jupyter I can use the same environment to do things in R. Installing
the r-kernel and R itself usually is not too difficult, but I have always had problems installing
more niche R packages. So this method described here, allows me, a non-R person to get all the R
goodness without too much hassle.
My overall bioinformatics analysis "stack" looks like:
- Nextflow for running heavy computation
- Python for munging the raw results
- R for final figures.
The NPR stack. All of these packages are easy to manage in a single conda environment. With one environment for each project.